YOLO Face Detection vs MediaPipe Face Detection: A Complete Guide
Learn how to implement face detection using YOLO and MediaPipe, with a detailed comparison of accuracy, speed, and use cases for each model.

by Akshara Soman

Face detection powers everything from Snapchat filters to security systems, but choosing and implementing the right model can be challenging. This guide compares two leading solutions - YOLO face detection and MediaPipe face detection - and shows how to implement them easily using Sieve's API platform.
To get started, create a Sieve account and install the Python package.
MediaPipe Face Detection Implementation
MediaPipe face detection, powered by BlazeFace, offers lightning-fast face detection optimized for mobile and real-time applications. It's perfect for video calls, AR filters, and face tracking where speed is crucial.
import sieve
file = sieve.File("path/img.jpg")

confidence_threshold = 0.05

mediapipe_face_detector = sieve.function.get("sieve/mediapipe_face_detector")
output = mediapipe_face_detector.run(file, confidence_threshold)

print(output)
YOLO Face Detection Implementation
YOLO (You Only Look Once) face detection excels at accuracy and reliability, especially in challenging scenarios with multiple faces or varying distances. It's ideal for surveillance, crowd monitoring, and applications requiring high precision.
import sieve
file = sieve.File("path/img.jpg")

confidence_threshold = 0.05
models = "yolov8l-face"

yolov8 = sieve.function.get("sieve/yolov8")
output = yolov8.run(file, confidence_threshold, models)

print(output)
Key Features & Capabilities
Both face detection models offer:
- Support for images and videos
- Adjustable confidence thresholds
- Structured output format with bounding box coordinates
- Easy integration through Sieve's API
Visualizing Face Detection Results
Use this code to display detection results:
import cv2

annotated_image = cv2.imread(image_path)
TEXT_COLOR = (255, 0, 0)  # red
thickness = 3

# Draw rectangles for detected faces
detection = output # Use: detection = output[0] for mediapipe
for bbox in detection['boxes']:
    start_point = bbox['x1'], bbox['y1']
    end_point = bbox['x2'], bbox['y2']
    cv2.rectangle(annotated_image, start_point, end_point, TEXT_COLOR, thickness)

cv2.imwrite('output_image.jpg', annotated_image)
Performance Analysis: YOLO vs MediaPipe Face Detection
Image Processing Performance


-
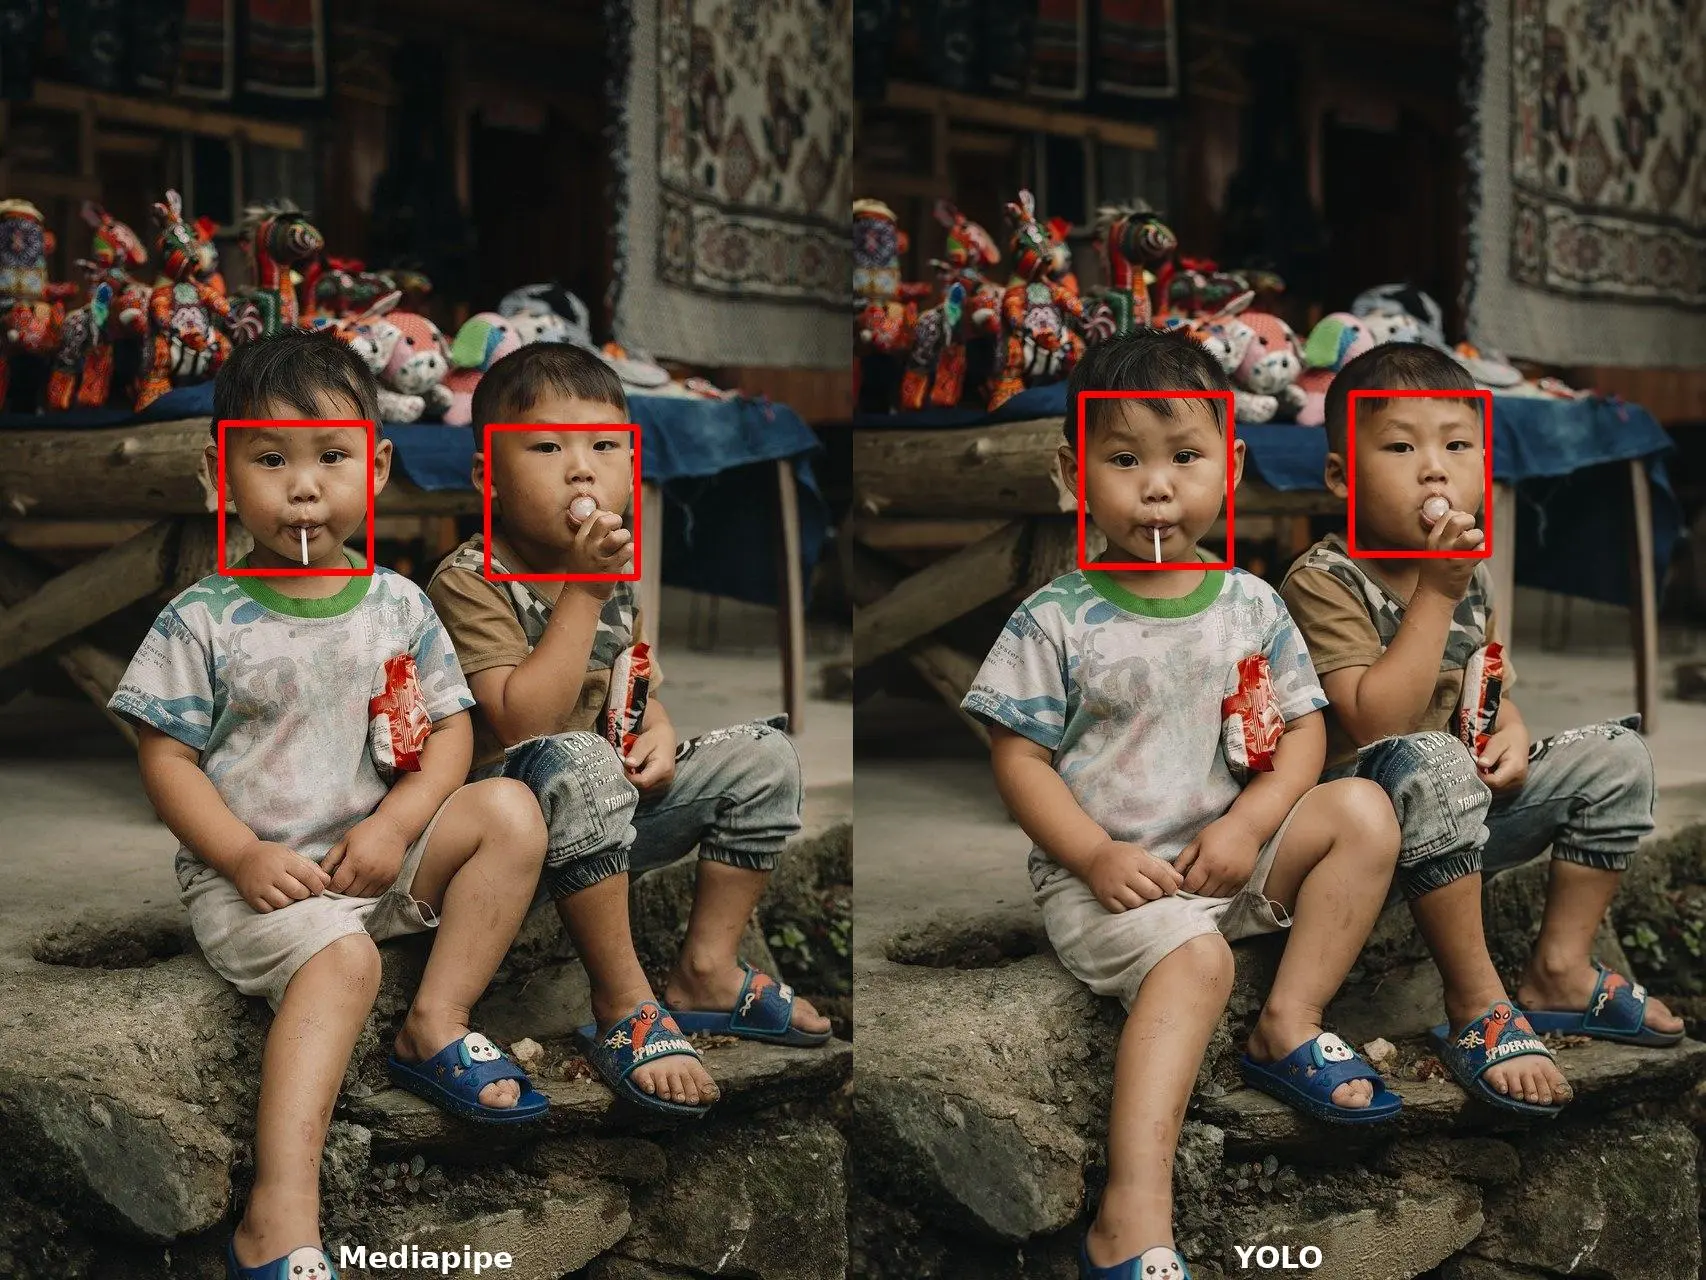
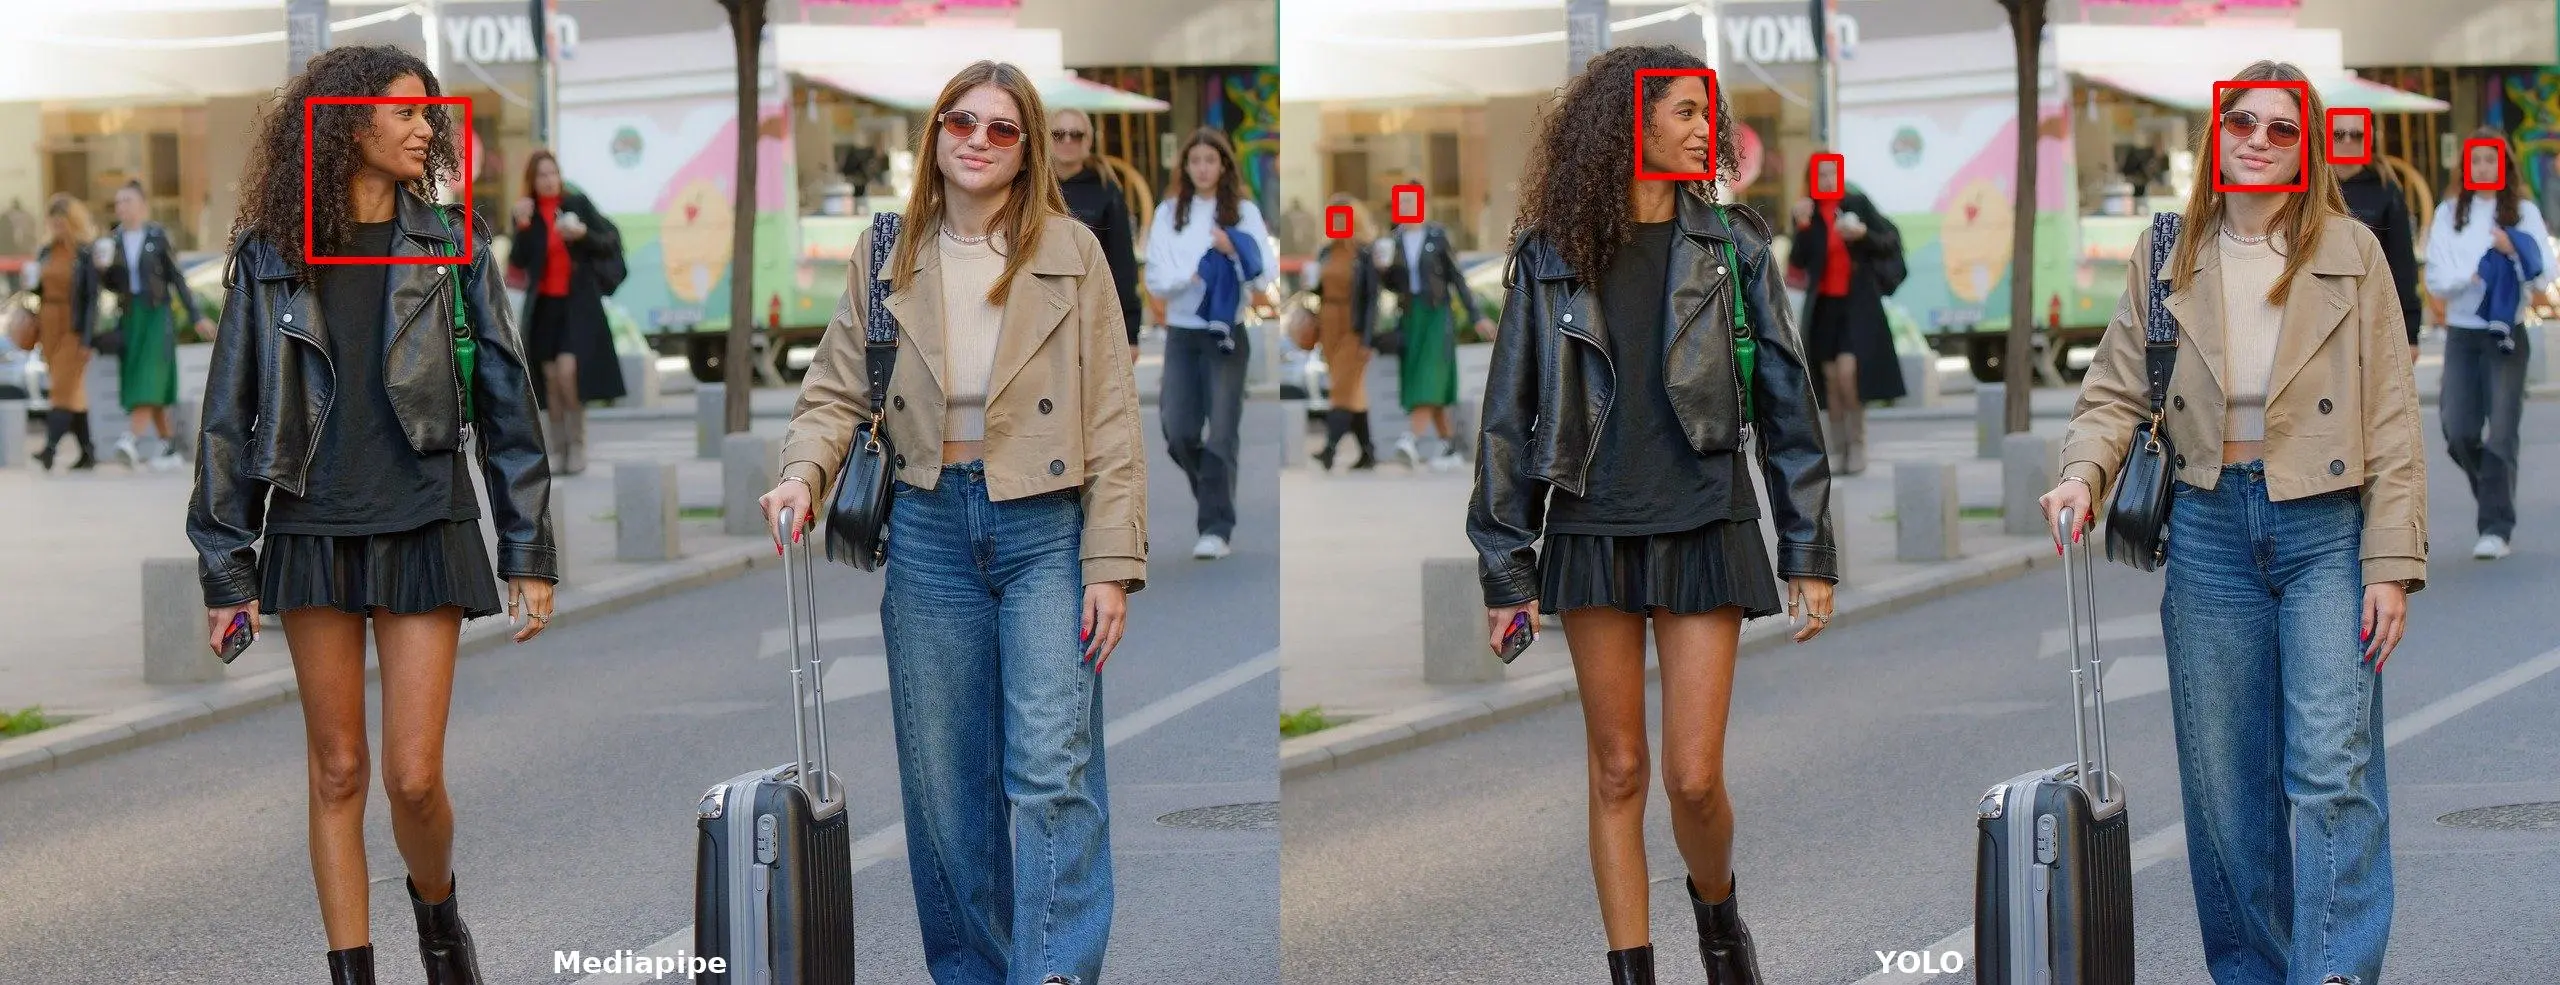
MediaPipe Face Detection:
- Sub-second processing time
- Reliable for frontal faces
- May miss faces at angles or in complex scenes
-
YOLO Face Detection:
- Sub-second processing time
- Superior detection of multiple faces
- Excellent at detecting faces at various angles and distances
Video Processing Performance
-
MediaPipe Face Detection:
- Processes 1-minute video in ~9 seconds
- Ideal for real-time applications
- Occasional missed detections in complex scenes
-
YOLO Face Detection:
- Processes 1-minute video in ~2 minutes
- Higher computational requirements
- Consistently accurate across all frames
When to Use Each Face Detection Model
Choose MediaPipe Face Detection for:
- Real-time applications
- Mobile applications
- Video conferencing
- Simple face tracking needs
Choose YOLO Face Detection for:
- High-accuracy requirements
- Complex scenes with multiple faces
- Surveillance systems
- Crowd monitoring
Getting Started with Face Detection
Sieve makes it easy to implement both YOLO and MediaPipe face detection without deep ML expertise. Check out our YOLO and MediaPipe documentation to get started.
For support or questions, join our Discord community or email us at contact@sievedata.com.